Screenshot on mac: Cropping a screenshot on a Mac can help clarify something if you cannot describe it clearly. The screenshot can sometimes be strengthened by drawing on it. Pictures speak louder than words. To show your friends or family how to use new Mac software, services, or anything else, you can email them.
Table of content (toc)
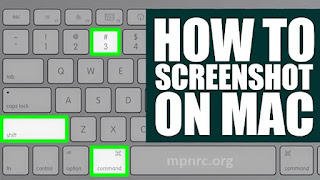
How to Screenshot on Mac
In Mac, a snipping tool named Grab is built-in. It allows you to crop screenshots of any screen or window. The Grab app has been replaced by Screenshot in macOS Mojave. It is not the case for macOS Catalina. Shift, Command, and five keys are needed to bring it up. Otherwise, keyboard shortcuts can be used to crop screenshots.
You can take a screenshot in multiple ways (or print the screen if you are coming from the PC world). We will go over the different critical combinations for taking screenshots and how to refine them so you can zoom in or crop them to a particular size. Moreover, we’ll consider photographing what you want when you can’t interact with the screen.
Several of the methods below work with all versions of macOS (or OS X), but macOS Mojave brought new screenshot options in 2018, so if you don’t have that version installed, you aren’t going to be able to use them.
It isn’t always clear how and where print screens are saved on the Mac. In this article, we explain how to take a screenshot from your Mac. We’ll also discuss how you can edit them.
You can change where screenshots are saved if you wish, but screenshots are committed to your Desktop by default. The screenshot will typically save as a .png file, which you can view in Preview or a similar image viewer and then save as another file type. Below we describe how you can change the format in which your screenshot is saved.
Method 1: Take a Screenshot on Mac
Get the most out of Grab on Mac by Cropping Screenshots
Grab is a Mac app that allows you to screenshot images. Although Mac screenshots are typical, you can take time-delayed screenshots using Grab as well. The command, shift, and five key combinations are required when using Mac OS Catalina.
Step 1: Launch Grab from the Launchpad. You can also find it in the Applications folder.
Step 2: On the dock, you’ll see Grab’s menu bar.
Step 3: You can crop an image on Mac by selecting Selection, Window, Screen, or Timed Screen.
Step 4: Click Download at the File menu, select Save as JPEG, PNG, or TIFF.
Method 2: taking a Screenshot on Mac
Cropping and editing screenshots on the Mac
It can be helpful to draw on a screenshot. That way, the message can be communicated more easily. Getting complete control over Mac screenshots can be achieved with Vidmore Screen Recorder. Vidmore Screen Recorder offers free screenshots with real-time drawing effects on Mac. With this program, you can crop, edit, share and manage screenshots on Mac for free. The features of this application are listed below.
Step 1: Install and run Vidmore Screen Recorder. Then choose Screen Capture from the main menu.
Step 2: Watch the cursor move in the pop-up window. If you are using a Mac, click the left mouse button to confirm cropping a screenshot of the entire screen or a particular browser. By using your mouse, you can also set a specific area for capturing screenshots.
Step 3: Edit the screenshot by using any drawing tool within the small window. The callout tool can be accessed by clicking the icon on the toolbar. Set the color and size as necessary. Now you can draw directly on the screenshot image.
Step 4: Delete the screenshot on the Mac, undo it, or redo it. Alternatively, you can click the Copy button directly to copy your screenshot to your clipboard. Pinning screenshots to the screen is also supported. Mac users can also choose to save screenshots by clicking Save. A pop-up window lets you specify a destination folder, tags, file name, and format. To keep your snapshot, click Save.